 Passo passo della realizzazione
di Etichette personalizzate
Making of a personalized Labels
In molte mi hanno chiesto come ho fatto le etichette che ho applicato alle mie creazioni di cucito creativo. Ecco quindi per voi il passo passo. Potete anche farle "al negativo", con una carta per tessuti scuri ed un appropriato nastro.
Many of you asked me how I realize my crafting labels; that's the tutorial. I can assure you it's very simple, and you can also choose a dark ribbon using the proper paper. MATERIALE (Foto oo)
Carta termotrasferibile per stampante a getto d'inchiostro, per tessuti chiari in cotone.
Nastro di raso nel colore scelto.
Stampante a getto d'inchiostro.
Ferro da stiro.
Spilli.
MATERIALS (Pic 00)
Thermotransferable paper for ink-jet printers (no lasers!), indicated for clear cotton tissues.
Satin ribbon, in the preferred color.
Ink-jet printer.
Iron.
Pins.
Foto 1 / Pic 1: La prima cosa da fare è certamente preparare la scritta da stampare. Scegliete carattere, dimensione, colore ed eventuali caratteri speciali; la dimensione del carattere dipende anche dall'altezza del vostro nastro: dev'essere coincidente quando andrete a trasferire. Considerate che a monitor la scritta è più grande rispetto a quando verrà stampata.
Io ho usato una dimensione 14pt. per un nastro da 10 mm di altezza. Fate anche dei bordi punteggiati: vi aiuteranno nella cucitura e nel trasferimento termico.
Dovete poi decidere quanto spazio lasciare all'inizio e alla fine della scritta: dev'essere sufficiente a rimanere all'interno della cucitura senza "mangiarsi" la frase.
Infine, riproducete la vostra frase in modo da occupare un foglio A4 (considerate 29,3x20,5 cm. circa massimo) e, seguendo le istruzioni specifiche della carta termotrasferibile, stampatela a specchio con una stampante a getto d'inchiostro.
Lasciate asciugare; poi tagliate orizzontalmente a strisce. Mi raccomando, non tagliatele singolarmente, vi complichereste la vita inutilmente.
Questo primo step è probabilmente il più complesso, può darsi che dobbiate fare dei tentativi per le dimensioni della scritta che possono risultare più piccole di quanto vi aspettavate. In questo caso, non buttate il lavoro fatto: comprate un nastro più stretto o, meglio, comprate il nastro dopo aver stampato.
First of all, let's prepare the file of the label. Choose your font, dimension, color and eventual special letters. The dimension of the font depends of the height of the ribbon: it has to be the same once transferred. Remember than the dimension viewed on the monitor is bigger than it is once stamped.
I've used a 14pt. dimension for a ribbon of 1 centimeter of height. Mark also dotted borders: they will help you during the cutting and transferring.
Then, decide how much space you have to leave before and after the phrase: it has to be enough to be sewed into the seam without cut the phrase. At last, copy the phrase to fill a page: the dimensions depend on your paper format, you have to stamp a whole page. Following the paper instructions, stamp it with an ink-jet printer using the mirror option. Let's dry then cut horizontal stripes. Dont' cut single labels.
This is probably the most difficult step of this tutorial: it's possible you have to make trials in order to adjust the dimension of the phrase, which can result littler then you expected it to be. In this case, don't throw your work: just choose a smaller ribbon or, better, buy the ribbon after you have done the stamp.
Foto 2 / Pic 2:
Ora è il momento di trasferire la stampa sul nastro. Distendete il nastro sul panno da stiro e posizionate la striscia sottosopra fermandola con degli spilli. Attenzione: per non rovinare nastro e scritta, collocate gli spilli alle estremità; il bordo punteggiato vi aiuterà a mettere gli spilli nel punto giusto tra una scritta e l'altra.
Gli spilli devono essere fissati in modo fermo ed infilati nel panno il più possibile, in modo da non intralciare il passaggio con il ferro da stiro.
Now let's transfer the paper. Lay the ribbon on the ironing board and place a stripe up down above the ribbon, holding with pins. Attention! To avoid to ruin ribbon and stripe, you have to place pins at the edges; the dotted borders will help you to put the pins between the phrases.
Besides, you have to press the pins into the board until the head, in order to not hamper the pass of iron.
Foto 3 / Pic 3:
Seguite le istruzioni specifiche della carta termotrasferibile: in generale il ferro dev'essere alla massima temperatura e il vapore dev'essere disattivato.
Passate, ripassate e premete il ferro finché...
Follow the paper instructions: usually, you have to use the iron at the max temperature and without vapor.
Pass, pass again and press the iron above the stripe until...
Foto 4 / Pic 4:
... la carta non cambierà colori nei marcatori della carta. Seguite in ogni caso le istruzioni specifiche della carta. Lasciate raffreddare.
... the paper will change color into the markers of the paper. Anyway follow the paper instructions. Let's cool down.
Foto 5 / Pic 5: Rivoltando la striscia potete vedere che io ho posizionato gli spilli lungo le linee punteggiate della carta, dove poi andrò a tagliare.
If you turn over the stripe, you can see the signs of the pins. I've placed it exactly along the dotted borders, where I'll cut the labels.
Foto 6 / Pic 6: Una volta perfettamente fredde, potete rimuovere delicatamente la carta protettiva.
Once the stripe is cold, remove gently the protective paper.
Foto 7 / Pic 7: Ora potete tagliare le singole etichette, seguendo sempre il bordo punteggiato.
Now you can cut the single labels, followind the dotted border.
Foto 8 / Pic 8:
Ecco il risultato, pronto per essere usato. Risulterà un poco rigido all'inizio.
These're the results! They will be a little rigid at first.
Saturday 3 November 2007
Realizzare etichette personalizzate / Making own labels
Labels:
crafting,
labels,
Veronica
![]() 32
comments
32
comments
Thursday 2 August 2007
Tingere o, meglio, stingere i tessuti / Fade fabrics
Tela color azzurro.
Batuffolo di cotone.
Candeggina.
MATERIALS
Fabric of sky color.
Cotton flock.
Bleach.
Prima di tutto fate attenzione con la candeggina! ;-)
Mettete un po' di candeggina sul batuffolo di cotone e tamponate qua e là per la tela fino a formare delle nuvolette.
Quando sarete soddisfatte, fate asciugare la tela e poi lavatela con sapone delicato per togliere l'odore della candeggina.
First of all, pay attention using bleach! :)
Moisten the cotton flock into the bleach and then dab the flock on the fabric in order to make clouds.
As you'll like the result, let the fabric dry then wash it with delicate soap to take away the bleach's smell.
Ecco la mia prova...
That's my result

Labels:
fading,
Mary
![]() 3
comments
3
comments
Wednesday 13 June 2007
Ribbon Trim / Decorazione con il nastro
 Making of a Ribbon trim
Passo passo della realizzazione
di una Decorazione con il nastro
Gosh its not as easy as it looks to photograph what you do, so I apologise if the photos aren't brilliant, I will write step by step as we go along though and hopefully that will make it a bit clearer, if not I'm sorry and you'll just have to ask me instead.
Pic 1 / Foto 1: To begin with you need 3 lengths of ribbon, usually I estimate about 2 metre lengths for a small hanging pillow so in total it would be 6 metres if you were doing it in all the same colour ribbon, make sure they are all seperate lengths. Next fasten the 3 lengths of ribbon to the bottom point (in this case is the heart point), I usually slip stitch this together.
Per cominciare avete bisogno di 3 pezzi di nastro, generalmente calcolo circa 2 metri per un piccolo cuscinetto d'appendere quindi in totale devono essere 6 metri se volete fare tutto con lo stesso colore, purché siano separati in 3 pezzi. Quindi attaccate i 3 pezzi di nastro nel punto più basso del cuscinetto, in questo caso nella punta inferiore del cuore; generalmente io uso il punto "slip stitch" per unirli.
Pic 2 / Foto 2: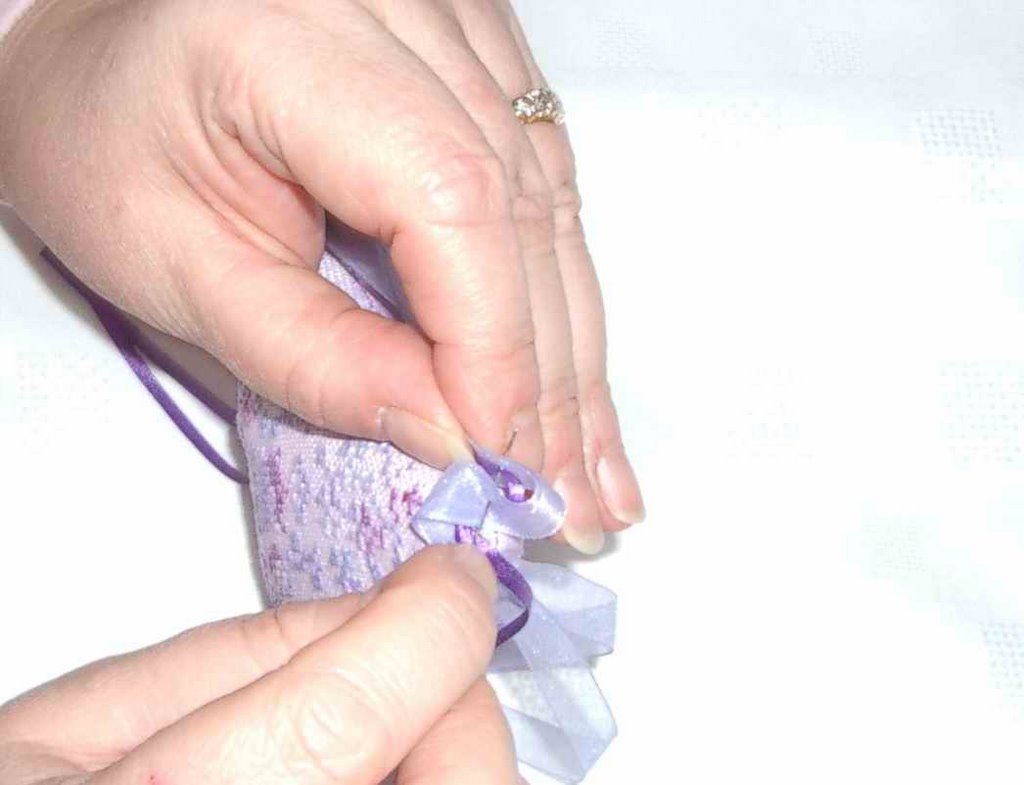 Now here I catch the ribbons with the needle and cotton pushing the needle through all the ribbon thickness.
A questo punto fate passare l'ago attraverso l'intero spessore dei
nastri sovrapposti.
Pic 3 / Foto 3: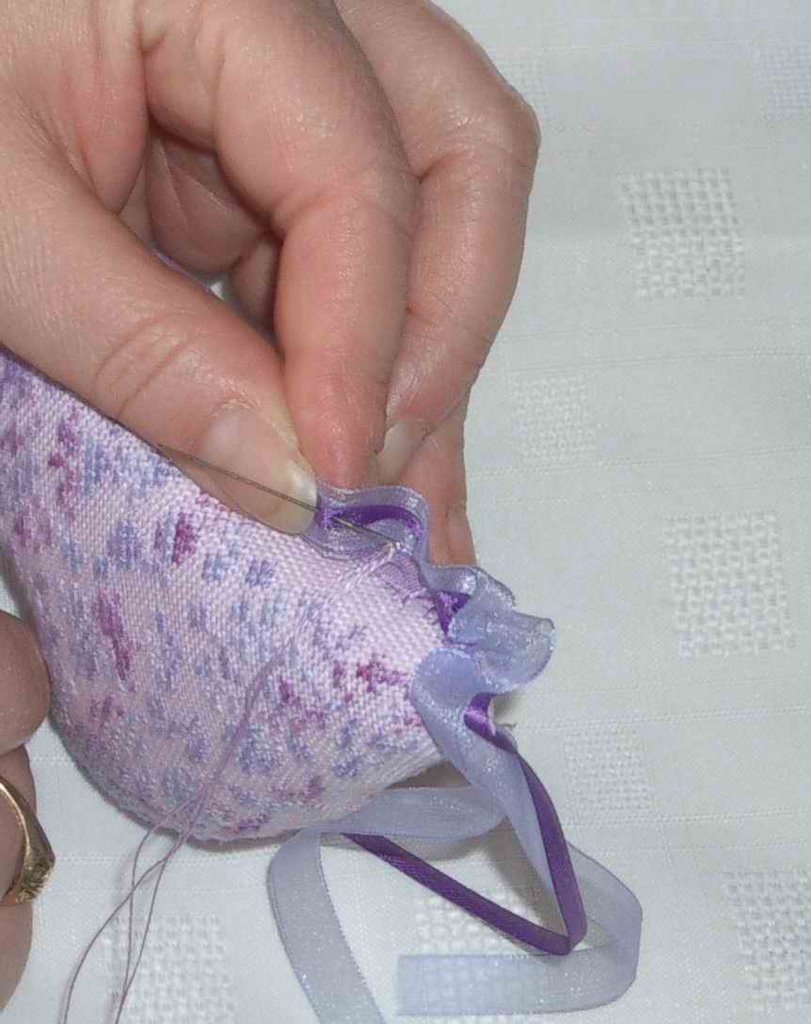 Then pull the thread towards you so that the ribbon ruches.
Ora tirate il filo verso di voi in modo da arricciare il nastro.
Pic 4-8 / Foto 4-8: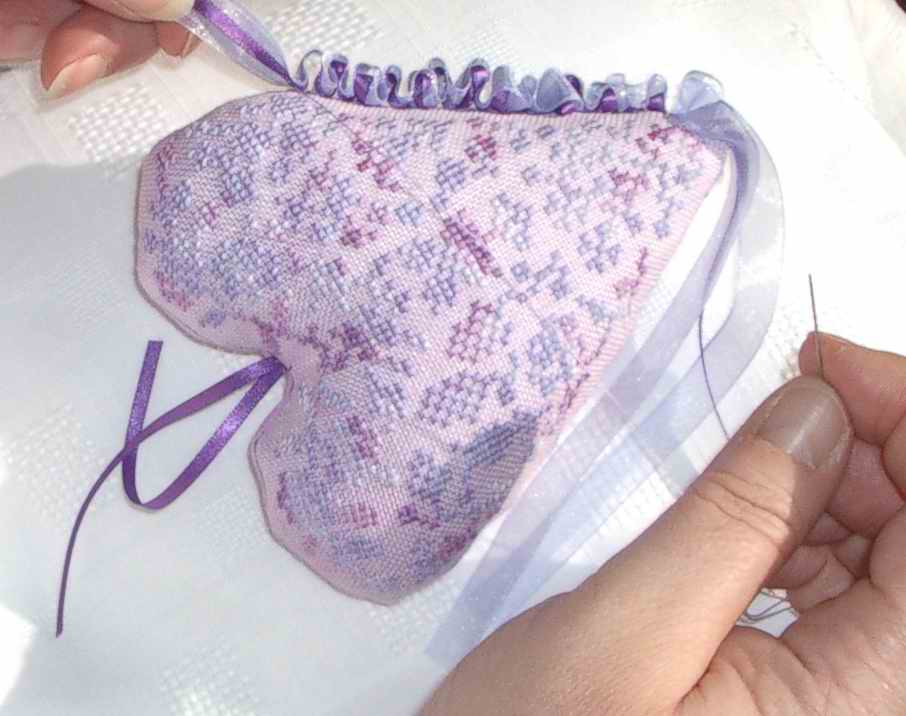 Then catch the fabric through the seams with you needle this is about 1/4 inch intervals as I go along, then catch the ribbon again, this is usually about 1 inch intervals along the ribbon or however far or close you prefer the size of the ruches.
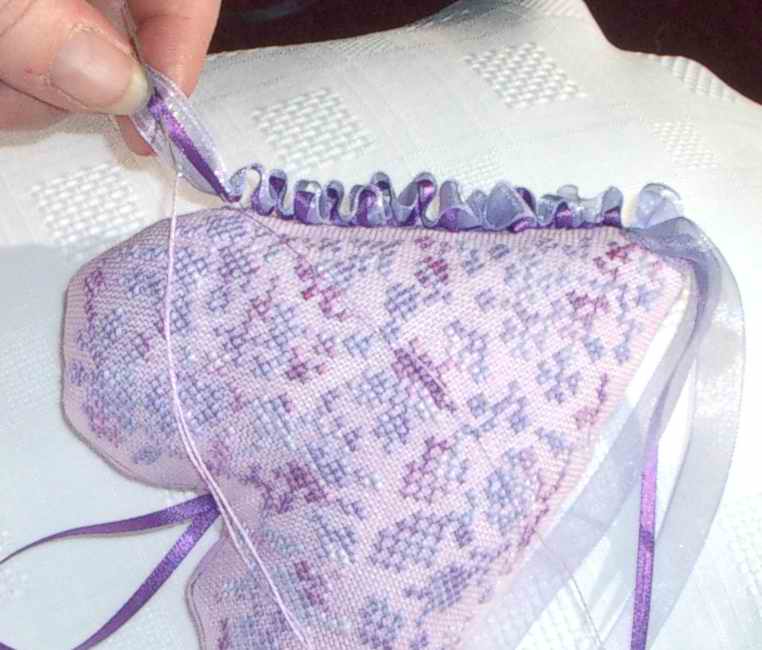 Continuate infilando nella stoffa lungo la cucitura ad intervalli di
circa 6 mm. poi di nuovo passate attraverso i 3 nastri sovrapposti:
l'intervallo in questo caso dipende dall'arricciatura che volete: di
solito io li infilo ad intervalli di 2,5 cm. circa.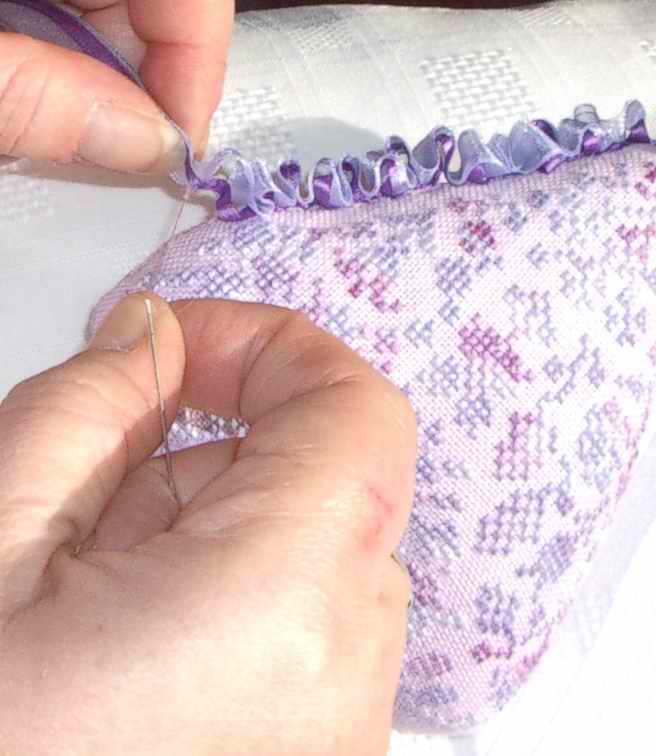 You do this all the way around your pillow until you get back to where you started I then catch the ribbons altogether and make a slight knot with them and fasten off, then trim the ribbons to length and you have the finished project.
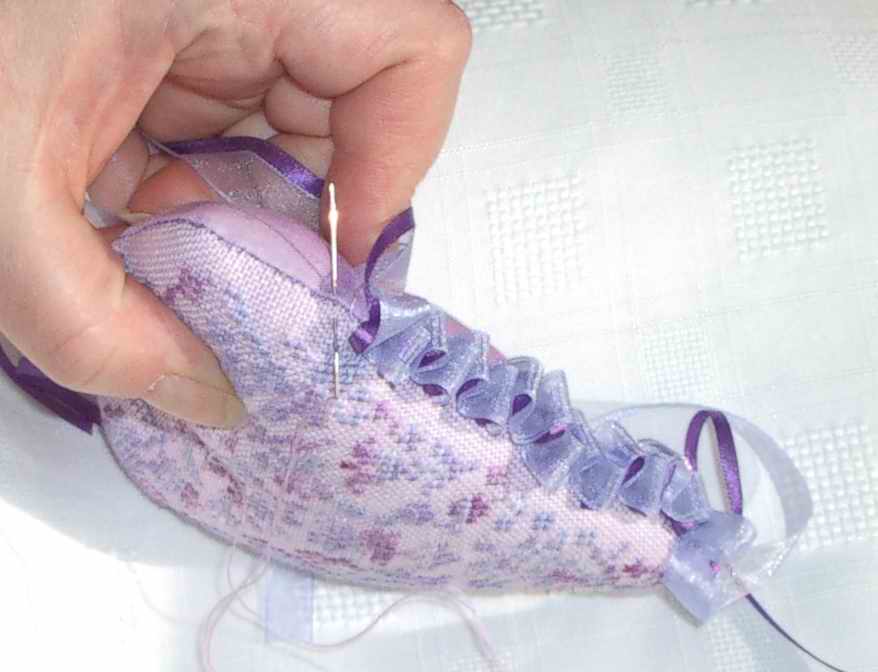 Procedete in questo modo lungo tutta la lunghezza del vostro
cuscinetto, fino a tornare al punto di partenza. A questo punto io di
solito io lego i nastri con un nodo leggero e li fisso. Regolate ora
la lunghezza dei nastri e il lavoro è terminato.
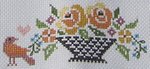
This particular project is for my MIL for Mothers Day, the heart is a freebie by Anne Les Petites Croix and the thread I used is Lasting Friendship by Dragonfloss, its a lovely varigated thread in soft lilacs and mauves, the fabric is 32ct Lively Lilac hand dyed by Kates Kloths.
Oroginal link: Ribbon trim
Labels:
finishing,
Su
![]() 3
comments
3
comments
Sunday 10 June 2007
Fodera a federa per cuscino / Slip cover pillow
Passo passo della realizzazione della Fodera a federa Making of the Slip cover pillow
MATERIALE (Foto oo)
Cuscino da ricoprire.
Ricamo delle dimensioni adatte al cuscino che si vuol rivestire.
Stoffa per il retro: tagliata in dimensioni più abbondanti della tela del ricamo; in lunghezza, dev'essere più lunga per il risvolto.
Forbici.
Spilli.
Macchina da cucire. MATERIALS (Pic 00)
Pillow to be covered.
Needlework piece of appropriate size.
Fabric for the back: bigger and longer of the needlework piece.
Scissors.
Pins.
Sewing machine.
Foto 1 / Pic 1: Innanzitutto, fate il risvolto al fondo del ricamo, rigirando sul retro la stoffa della misura che desiderate (almeno 7 mm.). Fermatela con gli spilli e stiratela con il ferro.
First of all, make a lapel at the bottom of the stitched piece. Choose how much you prefer the lapel on the back, but it must be almost 7 mm.
Hold with pins and iron it.
Foto 2 / Pic 2: Ora fate un passaggio con la macchina da cucire con un filo nello stesso colore della stoffa.
Now, sew the lapel with the sewing machine, using a similar color thread.
Foto 3 / Pic 3: La stoffa per il retro deve comprendere il risvolto interno, quindi dev'essere più lunga del ricamo; la misura del risvolto è proporzionata alla dimensione del cuscino da ricoprire.
Fate un primo piccolo risvolto allo stesso modo anche al fondo della stoffa che fungerà da retro. Anche qui, scegliete voi la dimensione, ma almeno 7 mm. Fate un passaggio a macchina.
The back fabric must provide the inner lapel to hold the pillow, so it must be longer than the needlework piece; the measure of the inner lapel is shapely the pillow's size.
Make a first little lapel at the bottom of the backfabric. Choose how much you prefer the lapel on the back, but it must be almost 7 mm. Sew it.
Foto 4 / Pic 4: Fate il secondo risvolto, quello che tratterà il cuscino nella sua sede per intenderci. Come dicevo, la misura è commisurata alla dimensione del cuscino: avrete dunque sul fronte la stessa dimensione della tela ricamata, e sul retro il risvolto per il cuscino. Cucite ai bordi per non farlo muovere.
Now make the second lapel, it will hold the pillow inside. The measure cannot exceed the size of the needlework piece: you'll have the front side of the same size of the needlework piece, and the lapel on the back side.
Sew the two lateral margins of the lapel.
Foto 5 / Pic 5: Ora sovrapponete, fronte contro fronte, le due stoffe e fissatele con gli spilli per non farle muovere. Cucite i tre bordi, tranne il bordo inferiore dove avete già fatto i risvolti.
Place the two fabric, front at front, and hold with pins.
Sew the three sides excluding the bottom side where you've made the lapels.
Foto 6 / Pic 6: Tagliate l'eventuale stoffa in eccedenza, per non creare antiestetici gonfiori.
Cut off the possibile surplus to avoid lumps.
Foto 7 / Pic 7: Pronti per rigirare?
Ready to turn over?
Foto 8 ultima / Pic 8 last: Ecco la fodera terminata. Stiratela ai bordi per appiattire il gonfiore della cucitura.
The pillow's cover is finished! Ireon it at the margin, to spread the lump of the sewing
Labels:
quilting,
Veronica
![]() 3
comments
3
comments
Friday 8 June 2007
Quaderno faidate / Linen book
 Passo passo della realizzazione del Quaderno faidate
 Making of The linen book
MATERIALE (le misure sono tutte larghezza per altezza)
Cartoni
per un quaderno A5:
2 cartoni da 2 mm. 20x23 cm.
1 cartone per il dorso da 2 mm. 4x23 cm.
2 cartoni da 1 mm. 19,5x22,5 cm.
1 cartone per la fascia centrale da 1 mm. 3,5x22,5 cm.
per un quaderno A4:
2 cartoni da 2 mm. 28x32 cm.
1 cartone per il dorso da 2mm 7,5x32 cm.
2 cartoni da 1 mm. 27,5x31,5 cm.
1 cartone per la fascia centrale da 1 mm. 7x27,5 cm. Lino
Lino
Dev'essere più grande di almeno 2,5 cm. dei cartoni, per ogni lato.
per un quaderno A5: il lino necessario è 50x28 cm.
per un quaderno A4: il lino necessario è 70x37 cm.
Sulla parte destra va eseguito il ricamo: realizzate un'imbastitura per delimitare lo spazio massimo entro cui va esequito, che poi è la dimensione del cartone interno, quindi:
per un quaderno A5: 20x23 cm.
per un quaderno A4: 28x32 cm.
Stoffa per l'interno
Dev'essere più grande di almeno 2,5 cm. dei cartoni, per ogni lato.
per un quaderno A5: il lino necessario è 50x28 cm.
per un quaderno A4: il lino necessario è 70x37 cm.
Ovattina a foglio unico per l'imbottitura
per un quaderno A5: 44x23 cm.
per un quaderno A4: 63,5x32 cm. Servono inoltre (Foto 00):
Vinavil blu per tessuti
Pennello, per stendere la colla
Nastro adesivo di carta
Forbici
Rivettatrice e Meccanica ad anelli
per un quaderno A5: meccanica a 2 anelli
per un quaderno A4: meccanica a 4 anelli MATERIALS (all the sizes are Width x Height, european measurement)
Cardboards
for an A5 book:
2 mm. 2 cardboards 20x23 cm.
2 mm. 1 cardboard for the spine 4x23 cm.
1 mm. 2 cardboards 19,5x22,5 cm.
1 mm. 1 cardboard for the spine 3,5x22,5 cm.
for an A4 book:
2 mm. 2 cardboards28x32 cm.
2 mm. 1 cardboard for the spine 7,5x32 cm.
1 mm. 2 cardboards 27,5x31,5 cm.
1 mm. 1 cardboard for the spine 7x27,5 cm.
Linen
It has to be bigger at least 2,5 cm. for side, than the cardboards
for an A5 book: the needed linen piece is 50x28 cm.
for an A4 book: the needed linen piece is 70x37 cm. The needlework has to be realized on the right side: make a basting to borde the maximum space you can stitch it (it is the dimensions of the cardboard)
for an A5 book: 20x23 cm.
for an A4 book: 28x32 cm.
Fabric for the inner part
It has to be bigger at least 2,5 cm. for side, than the cardboards
for an A5 book: the needed linen piece is 50x28 cm.
for an A4 book: the needed linen piece is 70x37 cm.
Cotton in sheet for the padding
for an A5 book: 44x23 cm.
for an A4 book: 63,5x32 cm.You need also (Pic 00):
Glue for fabric
Brush, to spread the glue
Paper adhesive tape
Scissors
Riveter e Ring machinery
for an A5 book: machinery with 2 rings
for an A4 book: machinery with 4 rings
Realizzazione di un quaderno A5 / Making of an A5 linen book
Foto 1-2 / Pic 1-2:


Nelle foto si vede il ricamo eseguito per la copertina e l'imbastitura che delimita lo spazio massimo entro cui eseguirlo.
In the pictures you can see the needlework stitched in the right side for the cover of the book and the basting made to border the maximum space.
Foto 3 / Pic 3:
Take the 2 mm. cardboard and join them with the paper taper in this order: the 20x23 + the spin 4x23 + the 20x23. The longer side is always the height of the book.
Foto 4-6 / Pic 4-6:


Giratelo sottosopra e, sulla parte in cui non è stato applicato il nastro adesivo quindi, incollate l'ovattina a foglio per l'imbottitura; usate qualche goccia di colla qua e là, serve solo per non farla muovere. Ritagliate l'eventuale eccedenza.
Turn upside down (the side with the paper tape is now down) and paste the cotton in sheet for the padding. Apply some drop of glue, to not let it move. Cut off the possibile surplus.
Foto 7 / Pic 7:
Place the stitched linen on the cotton...
Foto 8 / Pic 8:

... then turn upside down. The basting will help you to place it correctly.
Foto 9 / Pic 9:

Paste the redundant linen, start from the shorter side.
Foto 10-13 / Pic 10-13:


Una volta incollati i lati corti, prima di procedere ad incollare anche quelli lunghi, tagliate la stoffa in eccedenza all'angolo, come mostrato, in modo da non formare gonfiori.
Ora tocca all'interno; approfittate di questo tempo per posizionare l'esterno finito ora sotto un peso, in modo da far aderire per bene la colla.
You have just paste the shoter sides. Before you procede with the longer ones, cut the surplus fabric at the corner, at showed in the picture 10. So you'll not have lumps at the corners.
The outiside part of the book is finished. Place it under pression, it will help the glue to cohere the parts. Now, let's procede with the inner part.
Foto 14-18 / Pic 14-18:


Posizionate i cartoni da 1 mm. sulla stoffa che avete scelto per l'interno; ritagliatela per ciascun cartone, lasciando attorno ad ognuno la stoffa necessaria per risvoltare (2,5 cm. a lato).
Place the 1 mm. cardboards on the fabric you have chosen for the inner part. Cut the fabric around each cardboard, leaving the necessary to turn it and cover (2,5 cm. for side).
Foto 19-21 / Pic 19-21:


Rivestite singolarmente i due cartoni più grandi, seguendo l'accortezza dell'angolo.
Cover up the two bigger cardboards, remember the trick about the cover.
Foto 22-26 / Pic 22-26:


 Discorso leggermente diverso per la fascia centrale: incollate il cartone alla stoffa per la sua lunghezza; quando risvoltate la stoffa per il rivestimento, incollate solamente i due lati più corti.
The covering of the spine is a little different. Apply the glue to the cardboard and past it to the fabric. Now, turn the fabric to cover, but past only the shorter sides, like showed.
Foto 27-29 / Pic 27-29:


Recuperate l'esterno del quaderno che avevamo messo sotto pressione, stendete un strato di colla nella parte del dorso e appoggiate la fascia centrale testé rivestita, con la stoffa rivolta verso l'alto.
Recover the outside part of the book, spread a glue layer on the spine part and place the inner spice just covered. The fabric has to be upside.
Foto 30-33 / Pic 30-33:


Ora tocca agli altri due cartoni rivestiti: anche per questi, generosa dose di colla sia per l'esterno sia per i cartoni rivestiti, dalla parte del cartone rimasto scoperto.
Now, it's time to apply the remaining two cardboards: spread a glue layer both on them and on the outside part of the book.
Foto 34-36 / Pic 34-36:


Appoggiate i due cartoni sull'esterno del quaderno, sempre con la stoffa rivolta verso l'alto, con delicatezza e precisione: devono essere aderenti alla fascia centrale. Premete per far aderire la colla. Vedrete che ci sarà un lieve margine di un paio di millimetri rispetto alla parte esterna del quaderno.
Mettete sotto un peso il quaderno disteso per una mezz'ora, in modo da far aderire e asciugare la colla.
Place carefully the cardboards on the outside part of the book, the fabric always upside. The inside panels have to be close fitting the spine. Push gently. You'll have a little margin (about 2 mm.) looking at outside part.
Place the splay book under pression for about a half an hour, in order to let the glue makes its work and dries.
Foto 37 / Pic 37:
Apply the ring machinery with the riveter, centering it respect the height and at about 4 mm. to the inner margin of the inside panel.
You have to place it in the right side of the inside part, you'll have the cover in the left side.
Foto 38 ultima / Pic 38 last:

Your linen book is finished!
Remember to remove the basting on the cover.
Labels:
cartonnage,
cross stitch,
Maria Ben
![]() 10
comments
10
comments